I'm driving off for a while...

I may be back, so if you want to check back in later, feel free...
hasta la vista mi amigos!

Long time no stamp!!!

My stamps have been resting in boxes for a while and I am not sure how much longer this will take, but I will definitely start posting something again when I have some time for Stamp Therapy.
Hoping that is soon!!!

Merry Christmas 2009

Merry Christmas and Happy New Year! May God bless & keep you in 2010.

Happy Mother's Day

To everyone who is a Mommy and to everyone who has a Mommy -
- Happy Mother's Day.

Hoppy Easter


I just love this little bunny stamp. He is hopping right into Easter!
Here is how this card was made:
  1. Stamp bunny on strip of white cardstock & an extra bunny on a scrap piece of white cardstock
  2. Stamp flowers along the bottom of the strip of white cardstock and color in with markers
  3. Trim edge of stamped strip with blue marker
  4. Using a mouse pad for backing, turn stamped cardstock upside down and free-hand swirls & dots with a stylus tool
  5. Repeat swirl pattern on pink accent cardstock (I stamped the flowers along the bottom of the paper (back side) and outlined them with the stylus tool)
  6. Using stamp pad, drag ink over front of raised swirl/dot design to pick up the color(s) ... I used celery green & added some pink ink for the background paper
  7. Layer white cardstock strip to textured pink cardstock and then layer over two pieces of green background paper
  8. Stamp the flowers in a repeated pattern all over white cardstock using the ink pad to distress the corners
  9. Tie ribbons onto card front before adhering the layers onto the stamped card base
  10. Cut out extra stamped bunny, color ears, nose & cheeks with pink marker and attach with foam tape
  11. Add some bling with rhinestone stickers along the edge of the back layer
  12. DONE

Hoppy Valentine's Day

I love this sweet little bunny stamp, it is so Easter, but why can't it be Valentine's day too? I made this into a little holder for candy. I think I will work on a tutorial for this soon, it is so simple and cute (my friend Candy Heathman taught me this technique!) It is so very simple with just some scoring & layering it goes together very fast. A punch is used to slide the candy through (a little pack of gum fits well too) and then it is finished off with an adhesive velcro dot that I cut into fourths to close the card.

Gator Greetings

This sweet gator wishes you a Happy Valentine's Day!


He is from a retired stamp set from SU named Animal Valentines.

The background is stamped in black on white cardstock, the dots are just done with markers, and the pink/green flowers are brads.

I'm Ready For Spring!

I made this card today to personally invite Spring to HURRY UP!
I guess I am a little snowed in and am ready for a thaw, he he he.

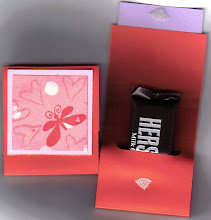
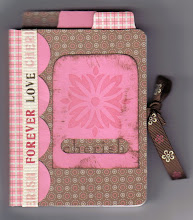
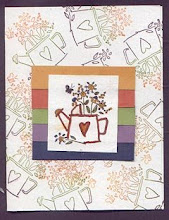
The Pink/Green/Chocolate are so sweet together and I love the way they make me feel!

Hope you enjoy too.

Watercoloring

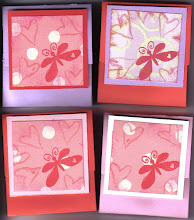
This card went together pretty quickly.

  • Start with a dark green card base. Using Basic Black ink, stamp the design
  • On a white piece of paper, repeat the center design of the card
  • Watercolor the image on white paper
  • Tear through the image at the top and bottom
  • Place over card front and attach with decorative eyelets
  • Roll the edges of the torn white paper to add some distressing
  • DONE

Simple Layers


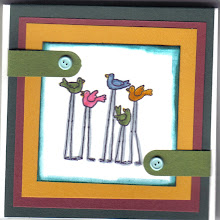
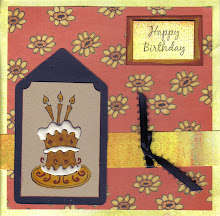
It is nearly Valentine's Day and I thought I better make some more cards before it gets too late to get them into the mail... Here is a card I made tonight with some basic layering. I layered the stamped images with foam tape over the ribbon set diagonally on the card front. The striped paper is scrapbook paper that I got in a bulk purchase a few years ago.

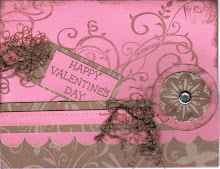
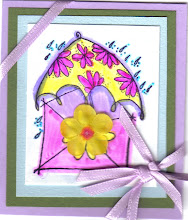
I used sticky pearls, hearts punched out of cardstock, and the little pink flower is a brad. Hope you enjoy!!!

Happy Spring!

Great People that visit my blog...

Stampin' Therapy

Stampin' Therapy
Now on facebook