Showing posts with label Techniques. Show all posts

Watercoloring

This card went together pretty quickly.

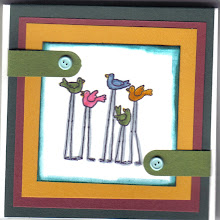
  • Start with a dark green card base. Using Basic Black ink, stamp the design
  • On a white piece of paper, repeat the center design of the card
  • Watercolor the image on white paper
  • Tear through the image at the top and bottom
  • Place over card front and attach with decorative eyelets
  • Roll the edges of the torn white paper to add some distressing
  • DONE

Pastels & Penguins

Card-A-Day (11)
I adore these little penguins!

This card was a little involved even though it appears like a pretty basic design... here is what I did:

  1. Fill large bowl with water and scrape pastels (chalks) into the water using a toothpick. I used blues and purple for this design...
  2. Cut pieces of cardstock to a size that will be big enough for the image, and that will also fit inside the bowl of water. Lay on surface of the water (with chalk) and remove immediately.
  3. Iron the cardstock to remove the water and prevent curling.
  4. Stamp & emboss image
  5. Trim & layer (I used decorative scissors for the layering)
  6. For the background: Stamp snowflakes with versamark ink then using a cotton ball loaded with chalk, rub across the stamped images. (Here I used three colors of blue)
  7. Add the layers to the card and add ribbon.
  8. DONE!

Although this is a little messy, you get a really fun card!

Peace on Earth

Card-A-Day (8)
This card was really interesting to make. I am always fascinated with embossing, but I did a little bit of a twist to the normal embossing here with a Reverse Embossed image.


  1. Ink a piece of cardstock heavily with embossing ink

  2. Pour gold embossing powder on and tap off the excess and heat

  3. Repeat steps 1 & 2

  4. Prepare stamp with versamark or Top Boss ink (ink as you would to stamp the image)

  5. Repeat steps 1 & 2 again, only this time add just a touch of black embossing powder along with the gold. (If you are doing your own project, you can do only one color & it looks just as great!)

  6. As soon as the image is heated (now a thick layer) stamp immediately into the warm gold/black embossing
  7. Now, just cut the image out and add ribbons then layer

  8. DONE

Card a Day Till Christmas...


I thought it would be so much fun to try to make a card-a-day until Christmas. Here is my card for today.

For the background, I heated a piece of foam until it was soft and pressed my background stamp into it (with a lot of pressure). I inked the foam and stamped one side of the card and stamped the opposite side with the stamp I used to make the 'negative' impression. I think it compliments nicely. I stamped snowflakes over the background side to give it a little more personality.
This card just feels very peaceful to me.
What do you think?

Bleaching Technique


  • I stamped this image on purple paper and embossed with white embossing powder.
  • I painted in areas on the dress and flowers with a water pen filled with bleach.
  • To attach the 'skirt' I cut a little slit along the waist and inserted a small rectangle of silver mesh, it naturally gathered as I inserted it into the paper. I attached on the back side with tape.
  • I really enjoy playing with the mesh. You can cut it to any desired width and it is so versatile. It makes amazing bows and I have seen myself buying EVERY color of mesh I can find at the fabric store. It is quite inexpensive and it goes such a long way.
It is so cute the way the little skirt puffs out and is so adorable! What an easy card to make. I love when you can make something quick and easy and it still has that WOW effect.

F.R.O.G.

I just thought this was the best advice. I made the card trying a new technique. I don't know if it turned out the way I wanted it to, but it is cute for the froggies.
I inked the stamp and then misted it with water to make it really wet and gushy before I STAMPED. Made kind of a sloppy water-color look . I think maybe I should have done a watercolor background to tie it all together? What do you think???

Make 'N' Take


This is the project we made at the
Saturday Make 'n' Take
(3/8/08 at Hill Street Mall in Globe, AZ)

3 sets: two stationary pages + matching envelope
(totalling 6 pages & 3 envelopes!)


TECHNIQUE: Masking

Candy Cards...

Candy Cards

These candy cards are so fun and easy to make! Thanks to Candy Heathman for sharing the instructions at the Kearny Stamp Group in January. Maybe I am getting carried away, but they are so much fun to give away...so far no one has said 'NO' to one yet!!!


Technique of the week...


Bleaching Technique
After tearing and layering colored cardstock onto white, stamp the words over the layered area.

Using bleach as your ink, stamp the image...as it dries, you will have the result you are looking for!

(NOTE: be sure to clean your stamp with soapy water before storing as the bleach may dry the rubber.)


TECHNIQUE: Bleach Stamping

Happy Spring!

Great People that visit my blog...

Stampin' Therapy

Stampin' Therapy
Now on facebook