


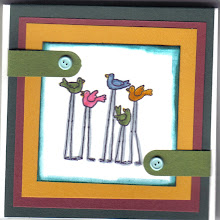
4.) I am using a solid stamp image and a decorative stamp that is the same size. Since I used the solid with the masked Christmas tree, I stamped the image on cardstock and punched it in a square shape then distressed the edges with the complimentary color (here I used cocoa to stamp, so I distressed with turquoise.)
5.) Stamp a piece of paper cut to just smaller than the card front. (The card shown here was a standard 4¼ x 5½ size.)
Place a small piece of tape to temporarily attach the card front to the card and punch the same size square you used for the accent above.
6.) Remove the card front and add ribbons as decoration. I am demonstrating them here with small strips taped at the back of the card front. (On one of the ribbons, tie another ribbon strip into a knot for an added embellishment.)


9.) Place foam tape on the back side of accent square piece completed earlier. Close the card and line the accent image up with the square on the card and adhere to inside of the card.
(All done with the card closed, this is why it was so important to line the card-front up with the card earlier.)
10.) Distress the card edges with ink using the turquoise first as it is the lighter color. Drag the card across the ink pad to get the desired amount of distressing and then repeat with the cocoa ink pad.
This is a view of the inside of the card:
Done!

I would love to hear your comments... What do you think about this project?




1 Nice things to say...:
that after going through all that to make this gorgeous card they etter had "cherish" it!
lovely work m'dear
Post a Comment